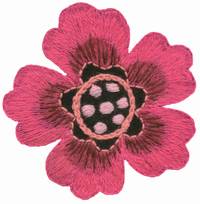
In this post we will share with you how to make a strawberry. We chose a smaller strawberry that is easy to make and the result is beautiful. See also flower making tutorial. Have a sweet summer.
For inspiration


Pattern for printing
This time the pattern sheet is a little different. We found a small napkin with a small composition on it. We also put it in two different sizes so that you can choose conveniently.
Be sure to let me know how you succeed in embroidering according to such a video tutorial?

And of course, the post is for everyone to share.

5 Kommentaari
Good tutorial. It will work. Thank you.
A very good tutorial for people like me who love embroidery but have no idea about the correct technique.
Many thanks.
I was taught that when it comes to embroidery, real embroidery experts will definitely look at the back of the work and the less thread you can see there, the more professional it is! This is a waste of thread at the moment.
Hello Kai,
Thank you for commenting and we will try to answer.
Leida has used dozens of different techniques in her work, which have produced the results you can see in the book, in the museum, and on the website dedicated to her life's work. This tutorial uses one of the many stitches that Leida Kirst has used over her 60 years of embroidery.
The connecting stitch is used more, but the use of other stitches should not make anyone doubt the authenticity of their home and residence.
The expression "wasting yarn" probably originated at a time when large quilts were being embroidered and yarn was scarce.
Different techniques have been used throughout time. Each embroiderer developed and tested new and more complex techniques to make the result more interesting. The correctness of the embroidery is always assessed primarily from the front. When assessing the back side, it is taken into account that there are no loose ends of thread hanging and that they are properly attached. High-quality work must be beautiful from both sides.