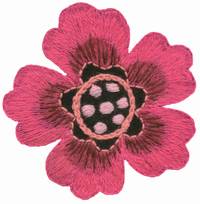
 To embroider cornflowers that are close to nature, it is a good idea to start by looking at and studying various cornflower photos. Of course, the strongest feeling and immediate inspiration comes from nature with blooming cornflowers. So, if the opportunity arises and the season is suitable, grab your camera and take your own personal photo series.
If you're already in nature, try to take photos so that the image is already in the composition, it will be easier later. At home, line up the photos, choose the most beautiful one, and then draw the outline of the photo on paper with a pencil.
 If it seems difficult, you can also print out the picture to better understand the outlines. Colored pencils or even watercolors will definitely help. That way, you already have two works of art – a painting and an embroidery.
The secret of a realistic cornflower also lies in different threads. Find as many different shades as possible in photos and use them in embroidery. Try to perceive different colors and see how the light falls and how shadows are created. Just like in nature, so in embroidery. A good result also comes if the composition includes flowers depicted from different angles. Also remember that when creating a composition, try to follow the rule that there is a master and a retinue. Draw larger flowers as the master and add different grasses and heads of grain as the retinue.
Since it is not possible to photograph cornflowers in the wild in Estonia at this time of year, we have made things a little easier. Find some time and explore our Muhu cornflower galleries.
In addition, exercise for the eyes
Look at the picture and count how many different shades of thread were used to embroider the flower in the picture. (Do not include green and brown).
 |
[poll id=”4″] |
